18 May 2009

Vegan Tofu Parm


My husband, the Carnivore, turns 32 today, and of course, he's going to ask for his normal birthday meal - Chicken Parm. Now, he loves this stuff like white loves rice, so of course I'm going to make it for him.

Typically what we do is swing from the carnivore end of the spectrum in winter to the vegan end in summer. Spring and Fall are transitions. It keeps no one extremely happy all the time, and everyone very happy some of the time.

And it keeps me on my toes.

Honestly, after a winter of 'flexitaring' over to the meat side of the pond, I'm just kind of 'done' with meat - and I'm allergic to dairy - so I've developed this variation of his favorite meal for myself.

Tofu Parmesan is surprisingly easy to make, if you have a few basic ingredients preassembled. This vegan version omits the traditional egg dip in favor of Italian dressing, which adds a lot of flavor to the meat itself. You’ll want to ensure that the dressing is vegan.

The addition of seasoned breadcrumbs enhances the dish, so that every bite is packed with taste. This recipe can easily be doubled or tripled and frozen. Simply freeze the dish after it has been assembled and before it has been baked the second time. To reheat, place - frozen - in a 400 degree oven for 18-20 minutes or until heated through.

1 14 oz package extra firm tofu, drained well

1/4 tsp garlic powder

1/8 tsp pepper

1/4 tsp salt

1/8 tsp tumeric

1/4 c bottled Italian Dressing

1/2 c commercial vegan parmesan, hemp nuts, or almond parmesan

1/3 c Seasoned Bread Crumbs or Better Batter Gluten Free Flour

2 Tbsp oregano

1/2 t salt

1/4 tsp pepper

1 jar commercial spaghetti sauce

8 oz vegan mozzarella cheese or 1 recipe dairy free mozzarella cheese

Instructions

Slice extra firm tofu into ‘patties’ - each 14 oz block of tofu should yield 4 patties.

Mix garlic powder, salt, pepper, and tumeric and sprinkle evenly over all sides of tofu patties.

Stack patties on top of one another and place into a freezer bag. Freeze at least 24 hours or up to 3 days. Thaw in the fridge overnight.

Very gently squeeze any remaining moisture from patties with a paper towel.

Brush Tofu Patties with Italian Dressing. Allow to marinate an hour.

In a medium bowl, combine vegan parmesan substitute, hemp nuts or almond parm; bread crumbs or flour, oregano, salt and pepper.

Shake excess dressing off of tofu patties and dip into ‘cheese’/bread crumb mixture, turning and pressing to coat well. Lay onto a rimmed, greased cookie sheet and allow to sit for 10 minutes, to allow coating to set. Spray with cooking spray.

Preheat oven to 350 degrees.

Bake breaded patties at 350 degrees for about 30 minutes or until golden brown.

Place baked patties in a 2 quart casserole dish. Top patties with a generous amount of spaghetti sauce. Evenly divide the vegan mozzarella cheese or Non Dairy Shreddable Cheese between the patties.

(You may freeze extra servings at this point.)

Turn oven to 425 degrees. Place patties in oven and bake until cheese is melted, about 10-15 minutes. Serve with gf spaghetti (we like Tinkyada) and sauce.

11 May 2009

Dieting.
There's a lot of great information out there in the health food community. And a lot of weird, unscientific, hinky stuff, too. How do you figure out what to believe? Well, if you're smart, you do your research...

Let me preface this article by saying I love raw foods. I love the creativity of the cuisine. I love the fresh, local approach to diet. I love eating salads and nuts and all kinds of cool things. I am a raw foodie, a member of several raw food communities, and an active participant in recipe creation.

That said, I'm a big believer in doing things that make sense. And in the Raw Community, there's advice and recipes founded on food science, and then there's everything else, founded on food philosophy.

For the purposes of this article, I'm going to define science as

22 April 2009

Earth Week: One Small Step, try gardening

Wondering what you can do this week to save the world? Why not plant a veggie garden?

There are about a billion reasons to plant your veggies:

Read More...

28 February 2009

Really Good DF Cheese, A Primer, with Cheddar Recipe


Nopers, people, your eyes are not fooling you. What you are staring at is homemade vegan cheese, shredded for prettifulness. You may be wondering how on earth I did that...

Glad you asked!

In this blog post I'm going to clue you in on the wonders of dairy free cheese. Hopefully by the time you've read this article and tested out my sample recipe, you'll understand the 'why's of dairy free cheese making and will be able to use the knowledge to make your own tasty cheese alternative.

Okay, so normally I'd launch into the many, many reasons why people choose to use or make dairy free cheeses - you know the drill - veganism, dairy allergy, dietary restrictions due to religious preferences that can't quite silence the siren call of cheeseburgers at midnight.... But my guess is that if you're searching the internet for 'dairy free cheese' or 'vegan cheese' or what-have-you, you don't really need a primer on the 'why nots' of dairy and are looking for something simple to get down to business.

And chances are if you've searched for a vegan or dairy free cheese recipe, it's because you've:
  • a) just paid entirely too much for something that smelled like stinky feet and tasted like turpentine
  • b) tried a recipe that just frankly SUCKED monkey eyeballs. You know the recipes.

There are several reasons typical vegan cheeses don't taste good to regular folk - among them the fact that vegans typically don't remember what real cheese tastes like and therefore have nothing to use as a Constant, to steal a term from my beloved show Lost (Best. Show Ever!)....

Penny is Desmond's constant, you see, which means he can't get lost in time anymore and(ahem...). Oh yes, this is a post about cheese. Where where we????

Cheddar is my constant. And vegans generally don't have cheddar as a constant. They have some overpriced form of soy cheese or something else barely palatable. And therefore anything homemade is bound to be an improvement. Unless you're a newbie to the whole enterprise and therefore not willing to settle for cheeze whiz flavored every-kind-of-cheese.

Another reason is that most vegan cheeses are ALL WRONG when it comes to the proportions of ingredients. The fat, sodium, and calorie count are all crazy and therefore the mouth feel is usually odd at best and nasty or worse otherwise.

Why does this happen? Mostly because people don't think aboutthose things. Fat content and protein and mouth feel and sodium are hugely important, but when you're mostly thinking about things like making a cheese 'sharper' or 'more melty' you forget that the mouth relies upon these cues as heavily as taste.

Honestly, though, I've seen enough Jo Stepaniak rip-off recipes to think that people don't really go outside of the box in how they formulate a cheese recipe, even for taste. If tahini worked for Jo, tahini works for them. And they forget to specify which tahini (trust me, people, it does make a difference!) or, or, or... And so they end up with a cheese that's all wrong on mouth feel and even wronger on taste.

And Jo's recipes - some of which are quite good, in all fairness - are, in the end, created by a long-term vegan. Which sometimes leads to strange cheese, indeed.

Which is how you - one of the smart ones - ended up here, learning how to make a proper cheese.


Okay, so here's the Food Science Lite of cheese making. Follow these rules and you'll be able to make a cheese to your liking:

1. Learn the Macros of the Cheese you're trying to make

By macros, I mean Macronutrients: the calorie, fat, carb, protein and (in the case of cheese) sodium content of the particular cheese you're trying to make.

This is very important, because you're going to have to replicate as closely as possible this series of numbers. The closer you get to the real macros the more likely you are to reach a satisfactory recipe.

Most dairy cheeses are high on three counts: Fat, Sodium, and Protein. If your macro count is too low in these three areas, your cheese will taste and feel 'off' or 'flat'.

Dairy Cheeses also happen to generally be low in carbohydrate. If your count is too high in this area, you'll end up with a 'sweet' cheese that tastes too much like a processed cheese or a pudding. You see this mistake in a lot of cheeses that rely on oats as a binder.


2. Find acceptable substitutes for those macros

You absolutely must match each macro for the cheese to 'feel' right in your mouth and to satisfy you properly. The easiest way to do this is to plug your ingredients into an online software like fitday or The Daily Plate and see what your macros look like compared to the dairy cheese you're trying to replicate. Let's take each macro at a time and list some of the possibilities you could use, by way of example:

Calorie - Calories will generally take care of themselves. If your other macros are right, that is. If your calories are low and your macros are not right, look for ways to boost the calories using ONLY the macros that you need.

Fat - Dairy Cheeses utilize saturated fats. This is very important for the mouth feel and consistency of the cheese. If you want a shreddable cheese that melts under heat, you're going to need some form of solid fat. You could use any number - Crisco, Earth Balance sticks, Palm oil... but I think virgin coconut oil is perfect for this application and tastes best in the finished product.

Coconut oil is also a beneficial saturated fat - it boosts your metabolism, helps your nerve function, and does all kinds of friendly things to your system, so you don't have to feel quite so bad about chomping it up. It also gets really hard in the fridge, which will help when you're attempting to shred your finished dairy free cheese.

Other great sources of fat are nuts (which also add protein and body) and tahini, which also adds a 'bitter' or cultured taste for those who wish to avoid soy.

Carbs - Most dairy cheeses are low in carbs, so you're going to want to avoid high carb ingredients in many applications. Keep this in mind when formulating a recipe. There are a few exceptions, I've found, but in general adding grains or sugars to a cheese recipe is a big no-no.

Protein - Most dairy cheeses have about as many grams of protein as fat. This can get tricky. Vegan sources of protein also tend to be higher in carbohydrate, so you're going to have to carefully balance a few protein sources in a single recipe to ensure that the ratios stay in place. Great sources of vegan protein include: nutritional yeast (which also tastes cheesy), nuts, soy, tahini (ground sesame seeds), miso (fermented soy paste - which helps add a 'cultured' or aged taste to a cheese), and protein isolates, like pea protein isolate and soy protein isolate.

In general I avoid the isolates - you can usually get a good ratio of protein and fat from other nonspecialized sources and the texture tends to be better. Those with a nut or soy allergy, though, may need to utilize something like a pea protein isolate.

It's important here to add something that, while it doesn't actually add protein, does something that the casein protein in dairy cheeses usually does - this is agar. Agar is a dried seaweed/seaweed extract that can be used interchangeably as a substitute for gelatin. It comes in two forms - flakes and powder. The powder is about twice as strong as the flakes and dissolves more easily, meaning less time in the kitchen. Agar is pretty expensive, so once you find you'll be making a lot of cheese you should probably buy it online. Non vegan people could use gelatin instead of agar, in roughly the same amounts, and this will also add protein to the finished recipe, but I wouldn't recommend it. An advantage agar has over gelatin is that it sets at room temperature, so you can leave your finished cheese on the counter without it turning into a pile of goo. Agar seems to melt more easily, too, which makes it the preferred of the two, even for non vegans.

Sodium - Here you can use normal salt to increase the sodium to the proper levels. The reason dairy cheeses tend to be so high in sodium is that many of them are salted during the curing process. This helps leach out fluids, preserve the milk until it ages, and adds a pleasing taste dimension. This, next to fat, is one of the most important macros to check for correctness. Another less effective method of adding sodium is using celery juice in place of water.

3. Determine which taste components are needed

Every dairy cheese has a 'flavor profile' - sharp, sweet, bland, smoky. This flavor profile is very important to match, if you want the cheese to taste right, as well as feel right. Your homemade cheese will benefit from melding for at least 4 hours or overnight - this allows separate taste components to mellow and mesh and will give you the most authentic taste. It's important to note that some seasonings sharpen over time (like garlic) which others mellow, and what tastes 'right' when the cheese is fresh may be too strong or weak once it's set.

These are the flavor components of most cheeses:

Salty - Most aged cheeses are very salty. In general the sharper the cheese, the saltier the taste. Also, anything brined (like feta) will be sharper. Flavor enhancers for this include: salt, nutritional yeast, miso

Sweet - The fresh, unaged cheeses tend to be higher in carbohydrate content due to the higher lactose content (aging destroys or eats this sugar in aged cheeses). This includes cream cheeses and ricottas as well as some 'stretchy' cheeses like mozzarella. Flavor components that add to this are sugars, some nuts like macadamia or almond, some grains like rice or corn. In general unless you're creating an unaged cheese sub, you won't need a lot of additional sweetening.

Savory/Umami - This flavor profile comes from the aging process of cheeses. THe more aged a cheese, the more important this flavor profile becomes. You'll want to use things like miso, soy sauce, nutritional yeast, ume plum vinegar, and onion and garlic powders.

Bitter - Bitter taste in cheese is often so slight as to be unimportant, but the bitter taste profile can exchange to a degree with umami or savory taste. A good example of this is Tahini, which can sometimes substitute for the umami taste for those who do not want to use a soy miso.

Sour - Sour taste is a by product of aging or brining dairy cheeses and is an important compenent of taste as long as it doesn't overwhelm the palate. Flavor components here can be: vinegars, lemon juice, citric acid or cream of tartar, or lactic acid cultures (which can be vegan, if ordered specially). This is particularly important in cultured dairy subs like sour cream and cream cheese, where a lactic acid culture or probiotic is ideal for recreating the essential flavor of the item.

Others- taste components like annatto (common in orange cheeses), turmeric, tomato paste, liquid smoke, and others can all be part of the non dairy cook's arsenal. Used sparingly these flavor constituents can all play a part in bringing together a taste reminiscient of the real thing.


Some things to note about non dairy cheeses:


While you may be able to replicate the taste and mouth feel of a cheese, it is very hard to replicate EVERY aspect of dairy cheese.

A 'for instance': It is possible to get a melty cheese that stretches, for instance, but you must use gelatin in place of agar (and enough of it to make the room temperature cheese gagolicious) - certainly not an ideal situation for a vegan. Most vegan melty cheeses will not truly melt until direct high heat is applied (like a broiler) and then a gently spreading of the 'melted cheese' with a knife may help the process along. And then they will not stretch - you end up with more of a cheese sauce type thing, with a lovely skin. Not bad, but not 'stretchy'. Be warned.

Another 'for instance': A good vegan cheese is shreddable, but it doesn't usually hold up as well to rough handling as dairy cheese. The reason is that the casein, which forms strong webbed bonds in normal cheese, makes for a stronger support system than the agar. The solution is to only shred very cold non dairy cheese (allowing the fats to be as solid as possible and the agar to be as firm as possible) and to do so gently working in one direction as you glide the cheese along the shredder.

You're going to want to create your cheese to be ideal for the final presentation - will you be melting it on a pizza? shredding it for salad? putting it in a sandwich? Each of these options will require you to make some decisions about ratios of things like agar and flavor components, and you should keep that in mind when deciding how to tweak your recipe. For example, I tend to use less agar in my cheddar cheese when I'm using it for a baked mac and cheese (where I use it hot as a melted cheese sauce) than I do when I want to shred it for salads.

Moving on to the recipe....

Here's a basic recipe for a good block (shreddable, meltable) cheddar cheese. You'll need to let the cheese 'cure' in the fridge at least overnight, in order to allow it to set properly and to ensure best flavor. This cheese was created to replicate Helluvagood's sharp cheddar cheese and makes slighly more than a pound of cheese. Remember - you may prefer a sharper or milder cheddar cheese, so feel free to play with the flavor components until you get a taste you prefer, but don't forget to double check your macros!

I think you'll find this equal to or superior to the vegan cheddars available commercially or in recipe form on the web.

This is NOT a tweak on anyone else's version of vegan cheese and is original to me, so you'll need to notify me if you do share this recipe (feel free to share with everyone! If you want to post this recipe elsewhere, please feel free, but remember to link back to this post and my original recipe.) Thanks!

(Notes for tweaking to omit tomato produces, nuts or soy are below the recipe)

Naomi Poe's Vegan Sharp Cheddar Cheese


1 1/2-3 c water
1-2 Tbsp agar powder (or 5 tbsp agar flakes) - please note, brands of agar perform differently, and this amount needs to be altered to YOUR brand's strength
2 Tbsp coconut oil
1 1/2 c blanched, slivered almonds *
1 c nutritional yeast
1/4 c white miso **
2 tbsp tomato paste ***
1 lemon -flesh and juice only (NO seeds or skin)
1 tbsp onion powder
1 tsp salt


Oil, spray or grease a small rectangular container or loaf pan.

In a small saucepan, mix the agar powder and 1 1/2 c water and let sit for a few minutes. Bring to a boil on medium heat, adding the coconut oil. Let boil, stirring occassionally, for abotu 3 to 5 minutes.

Meanwhile, in the bowl of your food processor, blend the almonds. At first they will turn into almond meal and then will begin to turn into almond paste. Add the miso and nutritional yeast and process until the mixture leaves the sides of the bowl and turns a bit doughy. Add the tomato paste, lemon, onion powder and salt and blend until thoroughly combined.

At this point, the agar and coconut oil should be melted and bubbling like thick syrup or hot gelatin. Quickly pour into the food processor. Process the whole thing until smooth. This should be about the consistency of cake batter or smooth cheese sauce. Add a little water if necessary - up to 1 1/2 c, if you find your mixture is too thick, and blend again.

Scrape into the prepared container and let cool uncovered, at least 3 hours or overnight, in the fridge. You may cover it after 3 hours. This will continue to flavor-meld and is better if left overnight. May be shredded or used anywhere cheddar is called for.

* Those avoiding nuts can use plain whole fat soy milk instead of the water in the recipe (omit the nuts entirely) OR may substitute raw hulled sunflower seeds instead. You should also increase the agar by 1 tbsp ( 3 tbsp of flakes) to thicken the body. This will yield a smoother, softer cheese.
** Those avoiding soy can use tahini instead, and should also do one of the following:
-substitute 2 tbsp ume plum vinegar for half of the lemon
- increase the onion powder by 1-2 tsp
*** Pureed red pepper can be used instead of tomato products. Those avoiding nightshades can use 1-2 tsp ground annatto (american saffron) and a dash of turmeric instead

Rough MACROS

Real Dairy Cheese:
per ounce
114 Calories, 9g Fat, 176 mg Sodium, 0g Carbs, 7g Protein

Naomi Poe's Vegan Sharp Cheddar Cheese:
per ounce
119 Calories, 9g Fat, 208 mg Sodium, 6.5g Carbs, 5.4g Protein

20 January 2009

Potato-Lentil Kachoris (Vegan)

This week's Menu Swap ingredient is Dal (lentils), chosen by our beloved SeaMaiden. Not even sure if I'm in the swap, right now, since I'm still catching my breath from updating my company's website, but I thought I'd jump in anyway, and enjoy the ride.

Tuesday nights at our House, we try to expand the palate. Generally we stick to Indian food, in honor of our Worldvision Child, K* - I'd stuck with South Indian food (K*'s area of the country) predominately, until my poor 5 year old just couldn't handle the spiciness anymore. Now I try a wider range - my 7 year old still begs for hot, hot, hot food - and I also incorporate some non-Indian food, like Moroccan, Persian, or Japanese. Anything to broaden the cultural horizons.

This week, since dal was conveniently on the list, I decided to scrap the meal I was going to make and try my hand at Idli. Unfortunately, Idli takes a long presoak, which I frankly, couldn't be fussed enough to do last night, so I skipped it completely, and moved on to Kachori.

Quick Note To Self: If you can't be fussed to do something, it's probably not a good idea to embark on an Indian Food Recipe, since Indian Food is all about the fuss. Just Saying

Kachori are savory-sweet stuffed balls of whole wheat dough, deep fried and served with 'pickle', which as far as I've been able to ascertain is a more spiced and often sweeter version of our own, American lactic acid fermented pickles.

Now, obviously, if you're gluten free, like my family, there's going to have to be some adjustments to the recipe off the bat. I subbed in my trusty Better Batter Gluten Free Flour for the whole meal, and in order to replicate the taste, I also used a judicious amount of my favorite teff and sorghum flours. This created a 'whole wheat' that was perfect for the dough.

The original recipe as I received it was also a bit heavy and spicy for both Smurfling and The Carnivore, so I omitted the 'chilli powder' (cayenne) called for and added a subtle paprika. I also substituted potato for half of the lentil paste. This lightened the filling and made it more subtle. I thought it was a definite improvement, even though I'm typically a lentil lover. It does change the taste, making the overall impression much sweeter, but it was fantastic.

Feel free to oven bake these, but you won't get the same texture as the real deal, which must be fried.

Have fun! This recipe serves 4 as an entree. You'll want to serve it with some 'pickle' and - if you're like me, a refreshing green salad, to help balance the heaviness of the meal.

Potato-Lentil Kachoris

Filling:
2 c cooked dal (split lentils)
2 c cooked, mashed potato
1 tsp oil or df margarine
1 tsp salt
1/2 tsp cinnamon, ground
1/4 tsp cardomom, ground
1/4 tsp black pepper
pinch each of garlic and onion powder (you can use hing, but I didn't have any)
pinch ground ginger
1/4 tsp ground cumin
1/2 tsp paprika (or if you're daring, cayenne)

Dough:
1 c Better Batter Gluten Free Flour
2/3 c teff flour
1/3 c sorghum flour
1 tsp salt
2 tsp oil
1 1/2 c hot water

Oil, for frying.

Instructions
In your food processor, blend the cooked lentils and potatoes until a paste forms. Add the oil or melted margarine, the salt and spices, and blend some more.

Heat a pan over medium high heat and turn the potato-lentil mixture into it. Stirring vigorously, cook the potato lentil mixture until it forms a ball and pulls away from the pan - this should take 5-6 minutes. Set aside.

In a bowl, combine Better Batter Flour, teff, sorghum, and salt. Stir in the oil and mix until the oil is evenly distributed. Add the hot water 1/2 c at a time and knead together - this should form a sticky dough. Set aside for 10 mintes.

The dough should have gotten less tacky at this point - more like pla-dough. Divide into 14 balls.

Faltten each ball into a disk, in the palm of your hand. The disks work best about 3- 4 inches in diameter and 1/8 inch thick.

One disk at a time, take a spoon and fill the center of the dough disk with the cooked potato-lentil paste. Form a ball around the paste, bringing the edges of the dough together and pinching to seal. Very slightly flatten the balls with your palms.

Heat enough oil to come halfway up the kachoris. Set the heat to medium. Place a few kachoris at a time in the oil, and fry until golden brown. Serve hot.

19 January 2009

Vegan Cinnamon Streusal Pumpkin Muffins

Baby, it's cold outside!

Frigid. Freezing. Subarctic, even.

And when it gets this cold, it's time to pull out the major comfort food. Cold mornings around here call for hot tea and something warm to nosh on, and this week, nothing sounded better than a plate of hot, soft, streusal topped muffins - the scent of spices filling the warming kitchen as the tea brews and the jam is warmed gently for spreading.

I have been trying to slowly wean my family off of its enormous appetite for eggs - eggs are all good and well, but when you're trying to do the green thing, they can get really pricey; and I've been trying to find ways to cut back from our four dozen a week habit.

A lot of baked goods can get by without the eggs. There are a lot of tricks one can use - pureed veggies and fruits as binders, chia gel, flaxseed 'egg'... the possibilities are there. Of course, you've got to be careful. Subbing in a banana in a standard muffin recipe works well, but it also makes the muffin into a banana muffin. In fact, any of the usual substitutes for eggs may change the recipe enough to make it a totally different beast.

That's not always a bad thing. These muffins started their lives as plain cinnamon streusal muffins. Sweet and warm, but really nothing more than glorified cinnamon toast, in my opinion. The decision to add pumpkin to the mix elevated these to another level of moist goodness, and allowed the streusal topping to enhance the muffin, rather than the muffin being there as the excuse to eat the streusal topping.

We chose to eat this muffin with Earth Balance and a lovely apricot-ginger-lemon marmalade that my grandmother gave me. A fantastic combination, but really gilding the lily. These muffins are fantastic as is.

Vegan Cinnamon Streusal Pumpkin Muffins

2 c Better Batter Gluten Free Flour ( or a really good cfc flour, or normal flour for glutenoids)
2 c granulated sugar (we use unrefined)
2 tsp cinnamon
1 tsp ginger
1 tsp baking soda
1/2 tsp salt
1 15oz can pumpkin
1/2 c vegetable oil
1 c water

Streusal Topping - 2 Tbsp Better Batter flour, 1/4 c sugar, 1/2 tsp cinnamon, 1 1/2 tbsp margarine or Earth Balance Spread

Preheat oven to 350 degrees. Line or grease 15 normal muffin tins or 12 texas sized muffin tins.

Combine flour, sugar, cinnamon, ginger, baking soda, and salt in the bowl of your mixer. Add pumpkin, oil, and water and blend until well mixed.

Spoon into muffin tins/liners, filling only 3/4 way full.

Mix streusal topping together until thoroughly combined. Sprinkly evenly over muffins.

Bake 35 minutes, or until a knife inserted in the center of one muffin comes out clean.

Serve hot!

18 January 2009

I'm Baaaack!

Hello, all! After a very long Sabbatical, I'm happy to report that I'm back and ready to roll with new menu ideas and great new recipes.

Here's what I'm cooking up for this week:
As always, new recipes will be posted at betterbatter.org some time this week!

Monday (Meat and Potatoes)


B Cinnamon Streusal Muffins with Apricot-Lemon Marmalade

D Stuffed Chicken Breasts, Mashed Potatoes, Green Beans Almondine

Tuesday (Indian)

B GF Oatmeal and Raisins

D Cabbage with Coconut (Bund gobi aur narial) and Deep Fried Brown Bread (Poori)

Wednesday (Pasta)

B Knothole Eggs

D Vegan Baked Ziti, Crazy Bread Style Breadsticks, Green Salad

Thursday (Meat and Potatoes)

B Cream of Rice with sugar and almond cream

D Liver and Onions, Salisbury Steak, Mashed Potatoes, Peas and Carrots

Dessert: Mixed Berry Cobbler

Friday (Chinese)

B Bread Puddings

D Chinese Potstickers,

Saturday (Mexican)

B Ginger-Lemon Pancakes

D Vegan Pumpkin Tamales

Sunday (Soup)

B Rice Cakes, Bananas, Peanut Butter

D Matzoh Ball Soup, Batter Bread Challah


So.... what's new with you?

14 May 2008

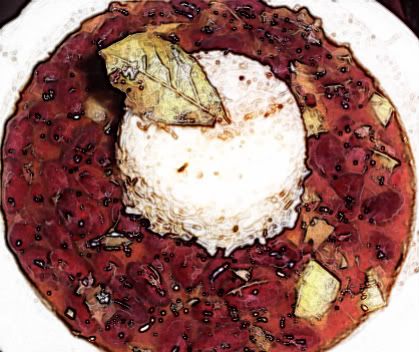
Gluten Free Adopt a Blogger: Cajun Red Beans and Rice

This month my adoptee was Shauna, from Gluten Free Girl.

Shauna's well known in the gluten free community for her stunning food photos and scintillating blog-skills. She's even gotten media coverage on the food network.

*This is me being jealous*

Anywhoodles, she's a really really good cook, and that's all you really need to know...

I was looking for a really great gf recipe from her wide, wide selection of gf offerings. The flourless chocolate torte tempted me....until we (the Carnivore and I) made a pact to go without refined sugar for a month. Drat. I decided, in light of my overwhelming sugar-temptation, to steer clear of anything remotely sweet and go for an entree instead.

There were so many choices that it was hard to narrow it down. Not entirely hard - Shauna's got a lot of meat/fish entrees, and while we spend the vast majority of the fall and winter meatifying ourselves, spring and summer are essentially vegetarian if not vegan affairs. I decided to go with her fantastic cajun red beans and rice recipe.

Now her recipe calls for sausage, and maybe ham, and... we're not eating meat, so I did have to do a bit of tweaking.

I calculated how much seasoning goes into 2 lbs of andouille sausage and added it to the recipe. This helps the general flavour of the meal to remain consistent to her recipe without sacrificing philosophy/budget.

Here's the link to her original recipe. At the risk of offending the adopter-goddesses, I'm including the vegan version here. My changes are marked in BLUE.


Tweaked Vegan Version of Cajun Red Beans and Rice

* 1 pound red kidney beans, dry
* 1 large onion, chopped
* 1 bell pepper, chopped
* 5 ribs celery, chopped
* As much garlic as you like, minced (I like lots, 5 or 6 cloves)
* I OMIT THE HAM HOCK she called for here
* Instead of sausage, use the extra seasonings I list:
  1. 1/2 tsp of Cayenne
  2. 1 1/2 tsp Paprika
  3. 2 cloves Chopped Fresh Garlic
  4. pinch Fresh Ground Black Pepper
  5. 1 tbsp Kosher Salt
  6. 2 Tsp Fresh Thyme leaves, chopped
  7. 1/4 tsp Crushed Red Pepper

* 1/2 to 1 tsp. dried thyme leaves, crushed
* 1 or 2 bay leaves
* As many dashes Crystal hot sauce or Tabasco as you like, to taste
* Creole seasoning blend, to taste; OR,
* red pepper and black pepper to taste
* Salt to taste


Soak the beans overnight, if possible. The next day, drain and put fresh water in the pot. (This helps reduce the, um, flatulence factor.) Bring the beans to a rolling boil. Make sure the beans are always covered by water, or they will discolor and get hard. Boil the beans for about 45 - 60 minutes, until the beans are tender but not falling apart. Drain.

[Not having planned ahead, I only had canned beans. I used three cans of red kidney beans, drained and rinsed them, then threw them in a big stockpot with some water, sherry, creole seasoning, bay leaves, and garlic cloves. I let them boil away for about half an hour.] I just used the rinsed cans of beans, and added the bay leaves, sherry, and garlic cloves, without boiling again.

While the beans are boiling, sauté the Trinity (onions, celery, bell pepper) until the onions turn translucent. Add the garlic and saute for 2 more minutes, stirring occasionally.

[I'm pretty much thinking that the more garlic, the better.]

After the beans are boiled and drained, add the sautéed vegetables to the beans, then add the ham hock (or ham or pickle meat), smoked sausage, seasonings, and just enough water to cover. Here I jsut used the extra seasonings and omitted the meat.

[I skipped the ham hock, which I'm sure was a travesty. Intead, I just threw in the sausages, seasonings, a little water, more sherry, and the shrimp.]

Bring to a boil, then reduce heat to a low simmer. Cook for 2 hours at least, preferably 3, until the whole thing gets nice and creamy. Adjust seasonings as you go along. Stir occasionally, making sure that it doesn't burn and/or stick to the bottom of the pot. (If the beans are old -- say, older than six months to a year -- they won't get creamy. Make sure the beans are reasonably fresh. If it's still not getting creamy, take 1 or 2 cups of beans out and mash them, then return them to the pot and stir.)

[As I wrote, when the concoction had boiled down to as much liquid as I wanted, I threw it into the crockpot and let it bubble on high for nearly three hours.]

If you can ... let the beans cool, stick them in the fridge, and reheat and serve for dinner the next day. They'll taste a LOT better. When you do this, you'll need to add a little water to get them to the right consistency.

Serve generous ladles-ful over hot white long-grain rice.

04 May 2008

RAW, vegan Girl-Scout Style Samoas

Girl-Scout Style Samoas

Food3_034-normal

(click on image to enlarge)

Makes A LOT

These were my favourite cookie growing up – I always took off with the box as soon as my mom brought them into the house. Eventually she gave up and let me have my own box. Then she got smart and made me buy them…

Now, I make my own. This recipe passed with a good girlfriend of mine, who said they tasted like the real deal.

Ingredients

  • 2 cups almond flour from making almond milk, dehydrated and ground
  • 1 cup coconut, ground into powder, (I use my coffee grinder)
  • 4 medjool dates, pitted
  • 1 teaspoon vanilla extract (or use vanilla seeds)
  • ⅛ teaspoon sea salt
  • *COCONUT FILLING*
  • 1 RECIPE Condensed Milk, from my profile page
  • 1 or 2 c dehydrated coconut
  • *CHOCOLATE DRIZZLE*
  • 1 RECIPE Chocolate Ganache, from my profile page

Preparation

In the bowl of your food processor, grind the almond flour and coconut until very fine and homogeneous, Add the dates, vanilla, and salt and blend until mixture comes together in a smooth mass – you may want to add the smallest amount of water to achieve this- no more than 2 tbsp!

Roll out to 1/8 inch thickness on a silicone liner or parchment paper and cut into small circles – I use a small 2 inch cookie cutter (an ‘o’ shaped one from my alphabet collection).

Place in the dehydrator and dehydrate at 110 degrees for at least 4 hours or until crisp (I usually dehydrate about 6 hours).

Mix the condensed milk and enough coconut to make a thick filling – it should be like really sticky macaroon batter. Place a small amount of this on top of the cookie, pressing lightly to stick the filling to the cookie. Place back into the dehydrator and dehydrate for about another 2-3 hours, or until the topping is set and thickened.

Make the Ganache, following the instructions on that recipe, cooling until the mixture is thick but still flowing. Dip the bottom of the cookies in the ganache and place on a parchment paper. Drizzle with ganache and place in the fridge to set. Store in a container in the fridge.

RAW, vegan 'Condensed Milk'

You'll need this recipe to make my famous girl-scout style Raw Samoas, but it's also a great alternative for condensed milk for those of us who can't or don't do dairy.

This is a fantastic replacement for condensed milk for recipes like Girl-Scout Style Samoa Cookies and Magical Seven Layer Bars (recipes coming soon). It will thicken and ‘caramelize’ in the dehydrator, and is surprisingly authentic in flavour. Don’t let the coconut scare you – this isn’t a ‘coconut’ flavoured condensed milk sub.

Ingredients

  • 3 tablespoons golden flaxseed
  • 6 tablespoons water
  • 1 cup agave nectar
  • ¼ teaspoon sea salt
  • 1 cup coconut, ground into powder, (I use my coffee grinder)
  • 1 tablespoon vanilla extract (or use vanilla seeds)

Preparation

Soak the flaxseed in the water overnight.

Blend at high speed in the blender until the mixture is ‘fluffy’ and frothy. Very, very slowly add the agave nectar. Add the sea salt, coconut, and vanilla and continue to blend until mixture is very smooth and creamy looking.

Pour mixture into a shallow dish and place in the dehydrator.

Dehydrate at 115 degrees for at least three hours, or until desired consistency is reached.

Use in recipes or continue to dehydrate to make ‘dulce de leche’

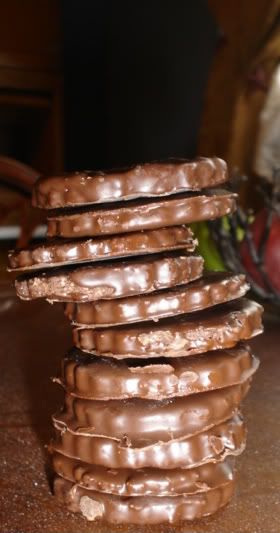
Girl-Scout Style Thin Mints (Vegan and Raw Versions)

There is nothing better than a girl scout cookie fresh out of the freezer. Of course, they're terrible for you. But they're so darn good.

I've had cravings for them for as long as I can remember. Naturally, when we went gluten free about 4 years ago the cravings increased. Of course they would. There's a principle called 'forbidden fruit..."

Anywhoodles, I finally decided to do something about it. Here are two variations of girl scout cookies. They both taste pretty darn real, and they're both easy. If you don't mind a non-vegan version of the baked ones, feel free to save yourself some time and use Hershey's Mint Chocolate Chips for the dipping chocolate.

Vegan Girl-Scout Style Thin Mints

Makes A LOT
The chocolate wafers that make up the base of these cookies go incredibly well for other applications (fake oreos or ice cream sandwiches, for two), but I think they're best here - robed in luscious mint-chocolate and begging to be scarfed. I made several tins of these for my family, and true to tradition, hid a few tins in the far reaches of the freezer, for myself.

Ingredients

  • 8 ounces organic palm shortening (you can use crisco if you prefer)
  • 4 drops peppermint oil
  • 1 c powdered sugar
  • 1 tsp vanilla extract
  • 1 c cocoa powder
  • 3/4 tsp sea salt (or 1 tsp salt)
  • 1 1/2 c Better Batter Gluten Free Flour
  • 12 ounces milk-free chocolate (we like a good dark chocolate chip)
  • 1/4 c organic palm shortening
  • 4 or more drops peppermint oil to add to the chocolate

Preparation

In the bowl of your Mixer, combine the shortening, sugar, peppermint oil, cocoa, sea salt, and flour. Beat until smooth. Place in the freezer to chill for about twenty minutes.

Lightly flour a silpat or parchment paper and place the dough on the surface. Flour the dough and roll out to 1/8 inch thickness.

Cut into 1 1/2 inch circles with a small cutter. Place on parchment or silpat lined cookie sheets. Bake at 350 degrees for 10 minutes.

Slip the liners onto cookie racks or cake racks and allow to cool completely. Peel from the sheet.

In a double boiler or bowl set over a pan of simmering water, melt the chocolate and palm shortening, stirring in enough peppermint essential oil to make the chocolate mint-chocolatey—be VERY careful! Too much peppermint will give you a ‘toothpaste’ taste. I like about 4 drops. Let the ganache chill until thickening, but still flowing (about 10 minutes in the fridge, stirring every so often)

Using a Fork, Dip each chocolate wafer into the peppermint ganache, hitting the fork gently against the side of the bowl to shake excess off. Place on a clean parchment paper and transfer to the fridge or freezer to set. Place in a container and keep in the fridge or freezer.


RAW (vegan) Girl-Scout Style Thin Mints

Makes A LOT

I fed these to a SADdie, without comment, and she said – ‘What did you make…gluten free girl scout cookies?”

Jst saying… these are as close to the real deal as you’re going to get in this life (without selling out). Thin wafers of mint-chocolate cookie are encased in a chocolate ganache.

These are best out of the freezer – of course that could be years of training speaking.

Ingredients

  • 2 cups almonds flour from making almond milk, dehydrated and ground
  • 3 drops peppermint oil
  • ½ cup coconut, ground into powder, (I use my coffee grinder)
  • ½ cup cacao powder, (use a really high quality)
  • 8 medjool dates, pitted
  • ¼ cup water
  • ¼ teaspoon sea salt
  • 1 RECIPE Chocolate Ganache
  • 4 drops or more peppermint oil, to add to the ganache

Preparation

In the bowl of your Food Processor, combine the almond flour, peppermint oil, coconut, and cacao powder. Grind till fine and homogeneous. Add the dates, water, and salt and process until the mixture comes together in a smooth ball, like cookie dough.

Heavily ‘flour’ a silpat or parchment paper with cacao powder and place the dough on the surface. ‘Flour’ the dough with cacao powder and roll out to 1/8 inch thickness.

Cut into 1 1/2 inch circles with a small cutter. Place on dehydrator sheets and dehydrate at 110 degrees for at least 10 hours, or until very crisp.

Follow directions for making Ganache, stirring in enough peppermint essential oil to make the ganache mint-chocolatey—be VERY careful! Too much peppermint will give you a ‘toothpaste’ taste. I like about 4 drops. Let the ganache chill until thickening, but still flowing (about 10 minutes in the fridge, stirring every so often)

Using a Fork, Dip each chocolate wafer into the peppermint ganache, hitting the fork gently against the side of the bowl to shake excess off. Place on a clean parchment paper and transfer to the fridge or freezer to set. Place in a container and keep in the fridge or freezer.

29 April 2008

COMING SOON: Vegan, Raw Girl Scout Cookies


like I said... coming soon. Hubby's calling me to bed *eyebrows*

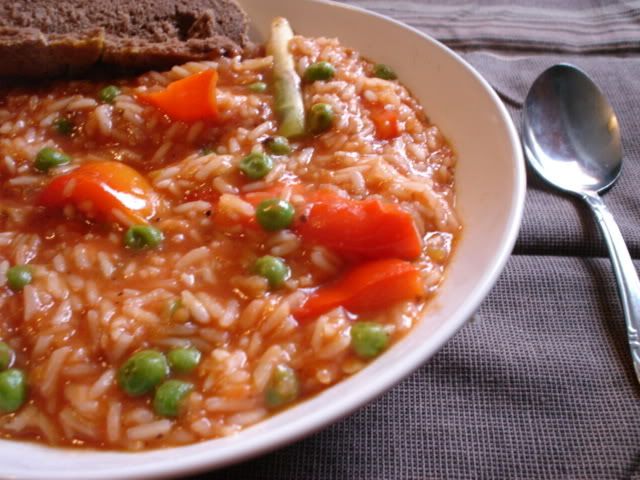
Vegetarian Paella

Rice commodities are rising, and are expected to continue to rise, so I thought I'd take a moment and make this classic dish before prices went into the stratosphere.

Paella comes from Spain, originally, taking its name from the Valencian word for 'frying pan' - it's usually made from vegetables, seafood, and meat, and liberally dosed with saffron and olive oil.

I was short on saffron tonight, so as you can see... I left it out.

It's usually cooked so that all the liquid is absorbed and the bottom forms this fantastic crust - my favourite part - but I was also short on time, and I thought that The Carnivore would react better to a 'stoup' - as Rachael Ray calls it - than a dryer consistency (which he usually refers to as 'a side dish').

Turns out he prefers to add a little ground beef to his paella - guess it's still a side dish - but the kids and I were loving it.

Here's the recipe for your perusal. Feel free to add saffron. Oh, and if you have time, let the rice completely absorb and form that crust. You won't regret it.

Vegetarian Paella

1/4 cup of olive oil

5 cloves minced garlic

1 large yellow onion, chopped

4 cups vegetable broth

2 cups rice

1 can crushed tomatoes 9or 4 large tomatoes, seeded and chopped and a generous 2-3 threads of saffron)

1 small red bell pepper, seeded and cut into thin strips

1 small green bell pepper, seeded and cut into thin strips

2 c asparagus, cut into small pieces

1 cup green peas

1 lemon

Heat the olive oil in a large frying pan and sauté the onion and garlic until the onion is tender and translucent. At the same time, heat the broth in a separate pan until simmering.

Pour the rice into the pan and sauté for about 3 minutes. Add the bell peppers and tomatoes and cook for a further 3 minutes. Add the simmering vegetable broth and cook over medium heat for 20 minutes or until almost tender and almost all the liquid has been absorbed. Stir in the peas and asparagus.

Squeeze the lemon over the rice. Continue cooking until the liquid has been absorbed and the rice is tender.

Serve the paella straight from the pan, garnished with lemon wedges.

It's Truly Vegan! Asparagus Linguini Alfredo


After four long years of waiting, our first crop of asparagus was finally ready to harvest - asparagus, you may not know, takes so many years to establish that it almost makes one wonder if it's worth it to plant in the first place.

Trust me - it is.

After four long... (did I say long? I meant loooooooooonnnnnnnng) years of cultivating the plants, you'll begin to harvest asparagus - lots of it. And you'll keep harvesting this (free!) veggie for the next twenty years. More if you're willing to do the back-breaking labour of splitting the roots.

I love asparagus. Every which way. In lemon sauce, steamed, boiled, baked, fried in tempura - I don't care how it's done. I love it.

I sat there wondering what on earth to do with this first harvest, and it hit me -- alfredo!
Rich and creamy, ultra dreamy loaded with fat and calories - who doesn't love the buttery, cheesy goodness of a real alfredo sauce?

Well, vegans for one.

Or those with dairy intolerances. What's a gal to do?

I came up with this lovely alternative for alfredo, and it passed with everyone - even The Carnivore. Everyone assumed it was the normal dairy version.

Traditional alfredo is pretty straightforward. Extremely high-fat-content butter (European style) is warmed and melted with plenty of high-quality Parmesan, that's thinned with just a bit of pasta cooking water. The starch in the pasta water gives a certain body to the sauce that would otherwise be lacking.

In the United States, things get a little more complicated. The lack of high quality butter (most of our butter has too high a water content to work) and parm makes it difficult for the average homemaker to make a good sauce. Also problematic - people tend to use too high of a heat or the wrong proportion of ingredients - and they end up with a gloppy-oily mess or something tasteless.

Because of this, most restaurants (and home recipes) use a flour-thickened cream or milk-based white sauce into which plenty of parmesean has been melted. Garlic and cayenne pepper are the secret ingredients of the most popular restaurants' alfredos.

People tend to crave what they know, and assuming people have rarely if ever had a traditional alfredo (I have...wow! Amazing), I went for the more commonly available taste and texture.

Macadamia nuts are the secret here for texture - They're superstars in the vegan world and great for subbing for dairy cream.

A combination of vegan 'cheeze' fave nutritional yeast, sunflower seeds, salt and garlic (and a tiny pinch of cayenne) takes care of the taste. One thing I advise - I've gone a little light on the salt. Traditionally Parmesan adds a very salty dimension to food, and your taste buds may insist on more salt. Feel free to add it at the end, by sprinkling over the plate.

Better Batter Flour adds body, and olive oil adds the final touch of fattiness to the dish and helps round out the flavour.

Asparagus Linguini Alfredo

1 pound Thai Kitchen Linguini style Rice Noodles
2 pounds fresh asparagus, trimmed and cut into small pieces
3 tbsp olive oil

2 c water
1/4 c Better Batter Gluten Free Flour (optional, for thinner sauce, omit)
1 1/2 c macadamia nuts
1/4 c sunflower seeds
1/3 c nutritional yeast
1 1/2 Tbsp sea salt
1 clove garlic, crushed
1/16-1/8 tsp cayenne pepper
1/2 c olive oil

Cook noodles according to package directions.

Meanwhile in a blender, combine water, flour, mac nuts, sunflower seeds, nutritional yeast, sea salt, garlic, and cayenne pepper. Blend until completely smooth.

In a saucepan saute asparagus with 1/4 c olive oil for 2-3 minutes. Add alfredo sauce and heat through. Stir in olive oil. Stir in hot noodles and serve.

Bengali Inspired Spinach Curry


I love Indian food - the blend of spices, the comfort-food textures - it's my idea of heaven. Unfortunately The Carnivore disagrees. To him Indian food is just so much weirdness rolled into one - and the fact that there's about zero chance of getting any kind of meat with the meal tends to put him in a 'lovely' frame of mind.

Because of that, I rarely make Indian food -- it's not worth the dirty looks.

So you can imagine my utter joy when my oldest son (whose turn it was to pick dinner) asked for ingredients that really and truly couldn't combine into anything other than... INDIAN FOOD!

This meal is really more of a fusion food than truly authentic Indian Food - I've been having massive cravings for black beans and spinach in some sort of combination (don't ask), so I had to tweak the original Bengali recipe a bit to make flavours mesh.

Contrary to popular belief, curries don't have to have loads of tumeric or (gasp) curry powder to work. Curry, according to a childhood friend of mine, is essentially any kind of a vegetable stew.

This particular curry is sweet and spicy, creamy and fresh, and blends well with the tumeric scented pilaf that I made as a side dish, using none other than our beloved Seamaiden's rice recipe as inspiration. It also happens to be super high in protein and fiber.

Enjoy!

Bengali Inspired Spinach Curry

1/4 c olive oil
1/3 c raw sugar
2 tsp mustard seeds
1 tsp cumin
1 tsp sea salt
2 Tbsp tomato paste

4 oz diced green chilis
1 onion, diced
2 pounds frozen spinach, thawed
2/3 c slivered almonds
1 c dehydrated coconut
4 c cooked black beans (1 can)
1/4 c water

In a large pan, saute the oil, sugar, mustard seeds, cumin, sea salt , and tomato paste until the sugar and tomato paste begin to caramelize.

Add the chilis and stir well. add the onions and saute till soft. Add the spinach, almonds, coconut, beans, and water, and simmer until heated through.

Serve with pilaf and naan.

18 April 2008

Chinese Spring Rolls and Dulse Rangoons


I've always been a sucker for things wrapped in wontons and deep fried - really doesn't matter that I'd be in pain for several days afterward - I have never been able to resist the siren call of the egg roll, the spring roll, and the infamous crab rangoon.

Of course, finding out that the misery was due to a genetic disorder really put a damper on m love relationship with these delicacies - the specter of cancer doesn't really make them as appetizing... and my decision to stop eating pork and shellfish sealed the deal.

Did you know that most egg rolls/spring rolls have pork in them? And most crab rangoons contain... you guessed it - actual crab. Shocker, eh? And the rangoons that don't??? Well they contain fake crab, aka GLUTEN....

So I've been rangunless for a while now, and I just couldn't take it any more.

I decided to make a go of it and came up with these recipes. Dulse adds a seafood dimension to both the spring roll and the rangoon. Have fun!

WONTON WRAPPERS
If you're going to make your own dim sum, you need wonton wrappers. These are relatively easy and very quick to make, and they can be used anywhere traditional wontons are called for. This makes 16 wonton wrappers.

1 c Better Batter Gluten Free Flour
1 egg
2 Tbsp water (up to 4tbsp total - save 2)

In the bowl of your mixer, beat the egg and flour together, adding 2 tbsp of water. The mixture should stick together when pressed - like a stiff pasta dough. If it's too dry add up to 2 tbsp of water.

You'll want to heavily flour your rolling surface. Split the dough into four parts and flatten each into a square. Sprinkle the top of the dough heavily with flour and roll out until the square is 8 inches by 8 inches - it will be thin.

Take a knife or pizza cutter and cut the square into four smaller squares.

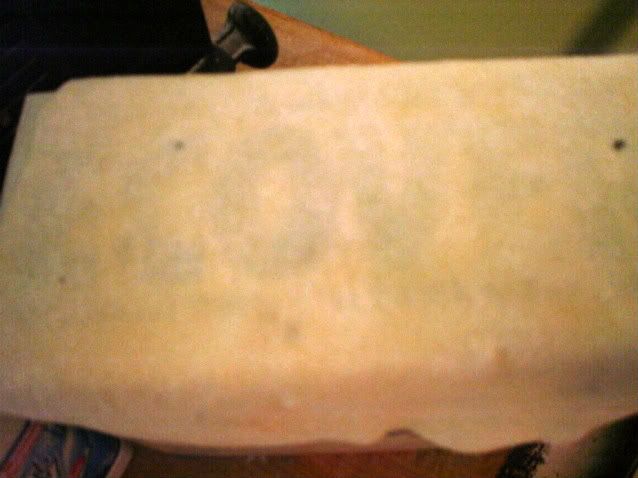
Now you can leave these squares as they are, but I think it's better to make the squares really, really thin. To do this you'll want to flour the rolling surface again, as well as the surface of the wrappers - don't worry that this will make them too dry - it will help combat the moisture of the filling. Roll them out until you can see through them - each square will be about 5 to 6 inches wide. I've included a rather ghetto picture of one of my wrappers on top of my ecover dishwashing tabs box, so you can see how thin the squares will be.

Use these anywhere you would use wonton wrappers.


Chinese Spring Rolls
It's a common misconception that spring rolls= rice wrappers with lettuce. Chinese Spring rolls differ very little from Chinese Egg Rolls - they're both fried parcels of cabbage wrapped in egg-dough wrappers. Not exactly what comes to mind when one thinks spring, I know. Still, these manage to taste fresh and light, which is a miracle in itself when you're dealing with anything deep fried. They're also extremely simple and require only easily available ingredients. Serve these as a meal in themselves, or as an accompaniment to any meal. This recipe makes 16 spring rolls.

2 c cabbage
1 c shredded carrots
1 onion, thinly sliced
1/2 c rice vinegar
1/2 c water
2 Tbsp dulse
1 clove garlic, grated or crushed
1/2 inch ginger, grated
2 Tbsp gf Tamari
dash hot chili pepper sauce

1 recipe Won Ton Wrappers

Mix the cabbage, carrots, onion, vinegar, water, dulse, ginger, garlic, tamari, and hot sauce in a bowl and let marinate overnight - you can let this soak for up to three weeks, and honestly I think it's better and tastes 'fresher' the longer it sits. Drain the mixture, squeezing it dry and reserve the liquid to make a dipping sauce.

Place a wonton wrapper on a floured surface. Working quickly, place about 3 Tbsp of the mixture on the wrapper, starting about 1/2 inch from the top and sides. Fold the sides of the wrapper in and quickly roll the wrapper into a sausage shape, enclosing the filling. Quickly dampen the edge of the wrapper with a wet finger and finish rolling the spring roll. Press lightly to seal and set aside. Repeat this process until you've used all of the wrappers and filling.

Heat at least 2 inches of oil in a wok or deep fryer. Fry up to three spring rolls at a time, until golden brown and crispy.

Meanwhile take the reserved liquid and add 1 tsp of either tapioca starch or cornstarch, and bring to a boil in a small saucepan. Let thicken and remove from heat - add salt to taste.

Serve the wrappers with dipping sauce.


Dulse Rang00ns
I couldn't take it anymore - I had to make some of those wickedly junk-food concoctions that I'm sure are pure Chinese-American junk food. Ranguns. Dulse gives a distinctly sea flavour to the cream cheese filling and deep frying makes these treats just like their restaurant counterparts. Don't be shocked by the inclusion of Worchestershire here - the basic ingredients of the stuff are staples in the asian kitchen. This recipe makes 16 ranguns.

4 oz cream cheese
1/4 c green onions, minced
1/4 tsp worchestershire sauce
1/4 tsp gf tamari
1 very small clove garlic, minced (about 1 tsp)
2 Tbsp Dulse

1 recipe Won Ton Wrappers

Beat the cream cheese, onions, sauce, tamari, garlic, and dulse together. Take 1 1/2 tsp of the filling and place in the center of each wonton wrapper. moisten the straight edges of the wrapper and,placing your fingers on each straight edge, press them together in the center, so that the corners form little pockets, or petals. This will take a few times to get exactly right.

Heat ta least 2 inches of oil in a wok or deep fryer and fry the rangoons a few at a time. Allow to cool for a few minutes before serving.

Adopt a Blogger: Tapioca Pudding

My adoptee of the month was Kate of Gluten Free Gobsmacked!

Now, apparently I'm supposed to tell you a little about her - last month I neglected to do this (*sorry, Sea!) because.... well, frankly because I'm notoriously fuzzy with details. So here's my take on Kate:

Kate's a long time celiac (2000, right, Kate??) who's famous for her beautiful photography and creative recipes. One thing I've come to appreciate about Kate is her ability to weave a tale. Usually a food blog (especially mine) runs something like this: "Blahblahblahrecipedescription, recipe, pic" Not the most scintillating to read... Kate manages to bring a background into her tale, and I find myself reading her entire post, instead of skimming through and looking at the pretty pictures.

In fact it was her warm and personal style that led me to adopt her this month. Many of you who follow my blog -- when I'm posting regularly - know that I have my own gf flour blend, and so Kate's recipes, which rely heavily on her own mixes and a more traditional approach, might seem a little strange. At fist I thought it was a little strange, too...

But Kate always has options available! I pulled a fantastic Tapioca recipe from her blog, and let the magic roll. Now my pic looks nothing like her pretty pic, so I'll let you wander over there and peek - I'm sure it tasted every bit as good.

Kate's recipe varies from the traditional recipes in a few ways -- most appreciated on my list, the cinnamon sticks, which lent a spicy, clean taste to the tapioca without muddying it, like ground cinnamon would have. I'd never thought to add cinnamon to tapioca pudding, but I don't think I'll ever want to make it otherwise, now that I've been enlightened!

The other major difference: This tapioca is baked. I honestly had never heard of a baked tapioca pudding before - baked bread pudding, baked rice pudding... but never baked tapioca pudding. This made the pudding a little more custardy, which is perhaps why she recommends adding whipped cream to the pudding afterward. We didn't, which is perhaps why our pudding isn't prettiful like Kate's.

I never thought it would be possible to call a tapioca pudding decadent, but Kate proved me wrong. Way to go!

11 March 2008

Buckwheat Crepes! My adoptee: Seamaiden


My adoptee for the Gluten Free Blog event is none other than our beloved Seamaiden! I chose to make her fabulous buckwheat crepes as my 'project.'

She recommended making a fantastic-sounding mushroom filling, but my husband wouldn't touch a mushroom to save his life, so I decided instead to make my family's version of Bananas Foster, recipe follows.

The crepes were delicious and very mild, compared to what I was expecting. I found that using two pans and staggering the whole 'pour, swirl, flip' method gave me exactly the perfect timing, and it cut down on the total time needed for the preparation. Brenda's method of blending everything in a blender was genius and made for a very silky, smooth batter. These crepes were really delicious.

Of course I used the Better Batter flour where she calls for 'your favourite gf flour mix' and I ground the buckwheat myself in a coffee mill, which to me makes for a lighter flavoured flour than stuff you can usually buy. It also makes for a lighter looking pancake, which was really nice. Expect if you make this using a commercial buckwheat flour that it will be darker.

Here's Sea's blog recipe: Buckwheat Crepes

And here is our version of Bananas Foster.... you'll find this one is more buttery and fresher tasting than the famous version.

Bananas Poe
1/4 c salted butter
1/2 c raw or demerrara sugar
1/2 tsp nutmeg
1/4 tsp allspice
1/2 c golden rum
5 large bananas, sliced

Melt the butter in a saucepan. Add the sugar and stir till dissolved. Add the nutmeg and allspice and stir. Stir in the rum, and heat until the sugar dissolves and the syrup bubbles. Stir in the bananas and heat until just warmed through.

Place the bananas in crepes or over pancakes and serve immediately.

06 February 2008

THE Definitive GF Croissant


The internet is a wonderful thing! A few months back I posted a great, super easy crescent roll recipe on my website. The ladies over at the Delphi Forum took it and improved upon it. Of course, I had to have another go at the thing, so I tweaked their version of it... The result was a delicious crescent roll, indeed.

One thing that bothered me about the recipe was the loss of the yeast, which lends itself to the flavour of the pastry. I detected a distinct 'baking powder' taste in the Delphi versions of the roll, which -although not at all objectionable - stopped short of a true croissant flavour.

The fact that the crescent roll wasn't going to rise, becuase of lack of yeast, bothered me to no end as well.
So of course, you know me...

Several tweaks later, I am proud to announce the absolutely, incontrovertably, most flaky, tender, buttery croissant you will ever eat, bar none. It also makes insanely great pain au chocolat and pigs-in-a-blanket.

I'd made my own version of Kate's 'army of crescent rolls' ... but they were literally all eaten before I could get the camera and snap a shot. Alas.

Mr. Picky... aka the hubby, says these are the real deal, and a woman at a local celiac conference (who's NOT a celiac and eats gluten as a religion, lol) wasn't aware that they were gf when she was eating one (she thought my stuff was just normal stuff for the regular vendors to eat, since it was separated from all the other samples) and was literally shocked that it wasn't a 'real' croissant.

I'll leave it to you to be the judge.

Here's my recipe. It makes 16 normal/Large sized croissants. Have fun!

The Definitive GF Croissant

Ingredients:
2 sticks of butter, (8 Tablespoons) frozen


1 package rapid rise yeast
1/4 c warm water
1/4 c sugar
2 sticks of butter, cold
3/4 c Full Fat Sour Cream
3/4 c Full Fat Ricotta Cheese
1 egg

2 1/2 cups Better Batter Gluten Free Flour
1 teaspoon salt
1 teaspoon cream of tartar
1 teaspoon baking soda

AT LEAST 3 cups of Better Batter flour for rollign

2 egg whites, beaten with 1/4 c water, till slightly foamy, for makign the croissants beautiful

Directions:

  1. Place yeast, water, and sugar in a bowl and set in a warm place to proof for 10 minutes, or until creamy and foamy. (This is important!)
  2. Cream together cold butter, sour cream, ricotta cheese, and egg until whipped, creamy and semi-yellow in color (about 3-4 minutes) - the butter should resemble cottage cheese
  3. Add Better Batter Flour, salt, cream of tartar, and baking soda. Mix together until the dough comes together - mostly away from the sides and begins to form a ball or lump in the middle of the mixer (about 3-4 minutes). It will still be sort of sticky!
  4. Divide into two portions. Shape each one into a rectangular patty about 4x6x1.5
  5. Place into a Ziploc bag. Refrigerate at least two hours, overnight preferred. This is important! If you're impatient like me, you can freeze it for an hour.
  6. Grate the frozen butter (I used my food processor) and put it into a freezer-safe storage container/bag. Return grated butter to the freezer until you are ready to use. (By the way, it will store indefinitely like this.) You can divide it at this time to make it easier.
  7. Work in a cool place, lay down a parchment paper or Silpat and flour heavily with about a cup of flour. You'll need a rolling pin for the next step!
  8. Remove one of the rectangles of dough from the fridge, and the butter from the freezer.
  9. Generously dust the top of the dough rectangle and roll the dough as to about 1/8 inch thickness. You should be able to see through the dough partially. I was able to roll the dough about 27” long and about 15” wide.
  10. Turn the dough lengthwise. Generously sprinkle the middle 1/3 of the dough with about 2-3 tbsp of the the grated, still-frozen butter. Fold up the bottom third of the pastry over the top of the middle third. Sprinkle two more tbsp or so of the grated, still-frozen butter over the top of the part you just folded on top. Fold down the top third of the dough to cover the center/butter again. If your dough is getting warm, please put it in the fridge for at least an hour (I work fast, so I don't do this).
  11. Generously flour the top, sides, and bottom (lift the dough gently to push flour underneath) of the dough. Repeat the rolling out thin and butter sprinkling one more time. You will sprinkle the butter on twice and roll out three times. You'll need a lot of flour, and you should be able to see the flecks of butter through the dough.
  12. After the round of of butter sprinkling and folding, turn the dough again and roll the dough out for it’s final time,rolling it to about 1/4 inch thick (not thicker!). Work quickly at this point as the dough is beginning to warm up again.
  13. Leave the dough lying flat along the parchment paper.
  14. Divide into long triangles with the pizza cutter (each triangle should be the full length of the long end dough - about 15 inches, with a wide end of about 4 inches. You will end up with 8 large triangles for each 1/2 of the dough. At this point you may want to fill your croissants with all kinds of goodies by placing your filling on the wide end of the triangle.
  15. Roll the croissant up from the wide end carefully (as the layers are thin). Seal the end (to keep it together during baking) by brushing the beaten egg white onto top ½ inch before finishing the roll. Shape into a crescent moon shape.
  16. Brush the completed croissants with beaten egg white (this makes them shiny and pretty).
  17. Lay the complete croissants on a parchment paper lined baking sheet and Let rest in a warm place for 30 minutes or so. Repeat steps 7 through 16 with the remaining dough.
  18. Bake the croissants at 425F for 18-22 minutes or until golden brown.
You'll have blistery, puffy, buttery, yeasty croissants. The real deal. YUM.

30 January 2008

Raw Fried Rice (cauliflower for people who hate cauliflower)

I'm not doing the RAW thing, perse... as far as counting percentages and obsessing. But I find that my brief foray into obsession opened up an enormous world to me - one that tastes better, most of the time, frankly. So I do find myself eating very High Raw most of the time.

This recipe is a super quick, super easy way to make a family favourite of mine - fried rice - without actually having to have any cooked rice on hand. Without actually having to cook, for that matter. If you're weirded out by the whole cauliflower thing, don't be. I hate raw cauli... but I love this dish.

Fried Rice

Raw_food_056-normal

(click on image to enlarge)

Makes 6+ cups

This rice is as close as you’ll come to real fried rice. It’s got the right balance of mouth feel and taste, and it was a winner here at the house, even with Mr. Picky. You’ll find this serves 3 VERY generously, or four, with a side dish. Feel free to serve it very cold as a salad, or slightly warm, as I’ve suggested, for an authentic Fried Rice.

Ingredients

  • 1 Head of Cauliflower
  • 1 ten ounce package peas, thawed, or fresh peas
  • 2 tablespoons onion
  • 2 cloves garlic
  • ¼ cup cilantro or flat leafed parsley
  • 1 inch of lemongrass
  • 3 tablespoons olive oil
  • a drizzle of sesame oil, optional
  • 2 teaspoons ginger, grated
  • Braggs, or gf tamari
  • 1 cup hulled sunflower seeds

Preparation

In the bowl of your food processor, pulse cauliflower into ‘rice’ and place in a bowl.

In the FP, pulse the onion, garlic, lemongrass, and cilantro or parsley until finely minced. Place in bowl.

Place peas in bowl. Stir all ingredients together.

Drizzle with oils and gf tamari or Bragg's. Stir in sunflower seeds.

Optional but AWESWOME: Heat on very low heat in a saucepan, stirring contstantly until just warm to the touch, or place in dehydrator for 30 minutes.